Run Workflows and Pipelines on hop-server
Introduction to the Apache Hop Server
The Apache Hop Server is a component of the Apache Hop (Hop Orchestration Platform) project, which is designed to facilitate the creation, orchestration, and execution of data and metadata processes. The Hop Server provides a scalable and flexible environment for managing and executing workflows and pipelines, making it an essential tool for data integration and transformation tasks.
Purpose of the Apache Hop Server
The primary purpose of the Apache Hop Server is to:
Orchestrate Data Workflows and Pipelines: It allows users to design complex workflows and pipelines that can be executed in a distributed environment. This helps in managing and automating data processing tasks efficiently.
Monitor and Manage Execution: It provides capabilities to monitor running workflows and transformations, track their progress, and manage execution logs. This helps in identifying and troubleshooting issues quickly.
Enable Collaboration and Scalability: By centralizing the execution of data processes, the Hop Server supports team collaboration and enables scaling of data integration tasks across multiple servers or environments.
Utilize External Computing Resources: Users can execute transformations/workflow on an external server with greater computational power, rather than running them on their local machines. This is particularly useful for resource-intensive tasks and ensures that local resources remain free for other work.
In summary, the Apache Hop Server is a powerful tool for managing and executing data workflows and transformations, making it a valuable asset for organizations looking to streamline their data integration processes.
Starting the Hop Server
For this short demonstration, I created a VM using VirtualBox and started the Hop Server there.
1
sh hop-server.sh 10.0.2.15 8000
Everything is set up so I can access the server via localhost:8080. Of course, you can also start the Hop Server locally without configuring a VM.
Setup Metadata
To run workflows or pipelines on the server, we first need to adjust the metadata. To do this, we open “metadata” and click on “Hop Server” first.

A tab will open where we need to enter the hostname, port, username and password.
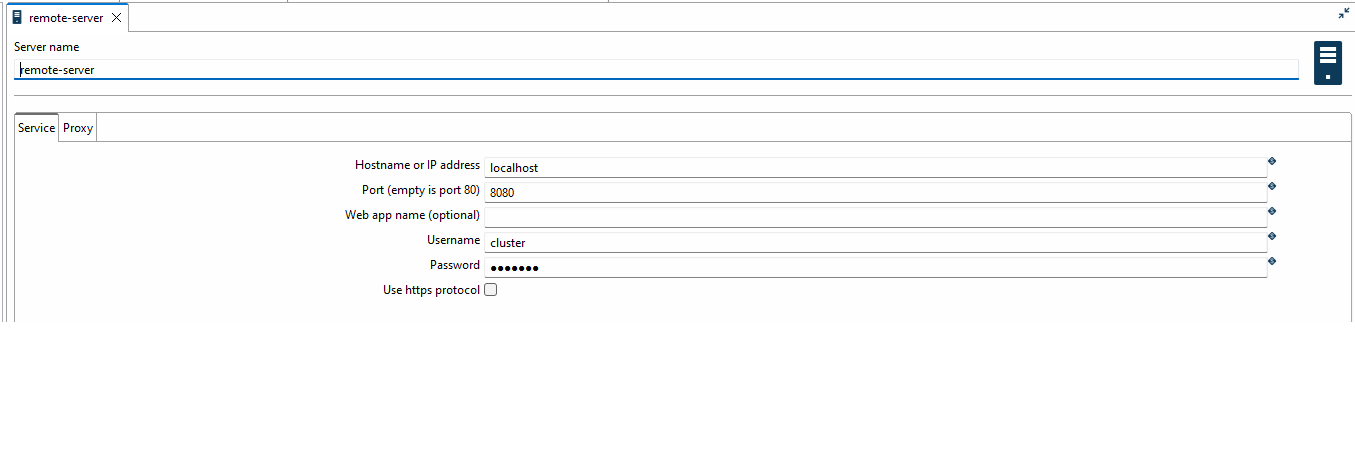
The Hop Server was started with its default configuration so the username and password is “cluster”.
To save your settings click on the tab and execute “Ctrl+S”. Currently, there is no button to test the connection, see: #2520
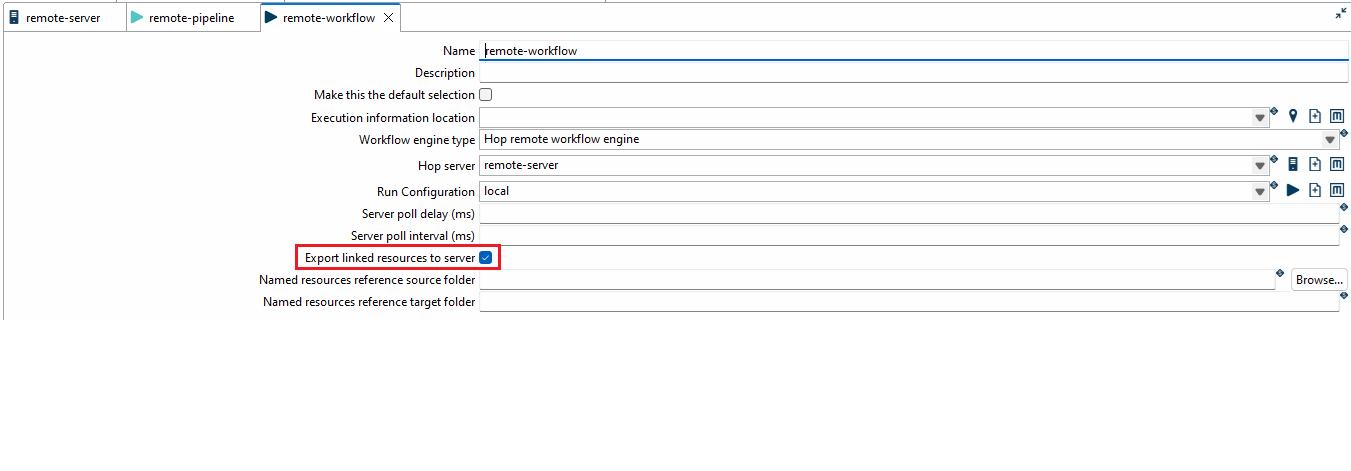
The next step is to define the “Run Configuration” for workflows and pipelines. To do this, select “metadata” and click on “Workflow Run Configuration”. We choose “local” as run configuration and select our remote server. Additionally, we set the engine type to “Hop remote workflow engine”. Also, enable “Export linked resources to server” and save the settings.
This option picks up not just the pipeline or workflow you are exeuting remotely but also the referenced pipelines and workflows!
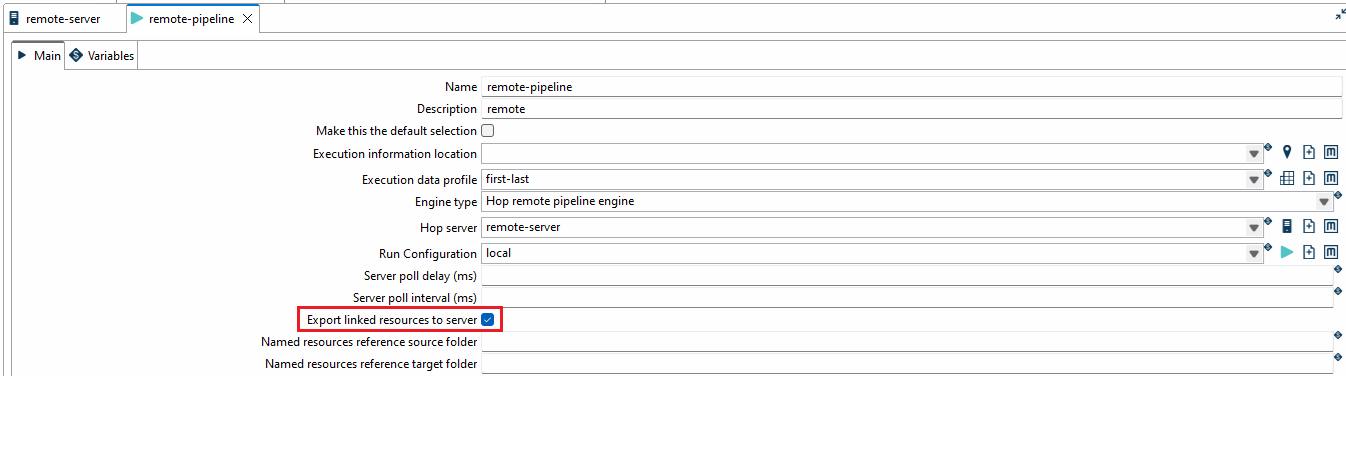
Save the settings and adapt the “Pipeline Run Configuration”.
Caution: When the tab is reopened, it’s possible to re-reference the run configuration settings to itself, leading to a loop, see #3935
Create Workflow and Pipeline
After we have configured the server, pipeline and workflow run configurations, we will now quickly create an example that can be executed via the hop-server. For this example the “Generate rows” step has been used to generate 10 rows with the value “x”. Further the rows will be logged by the “Write to log step”. 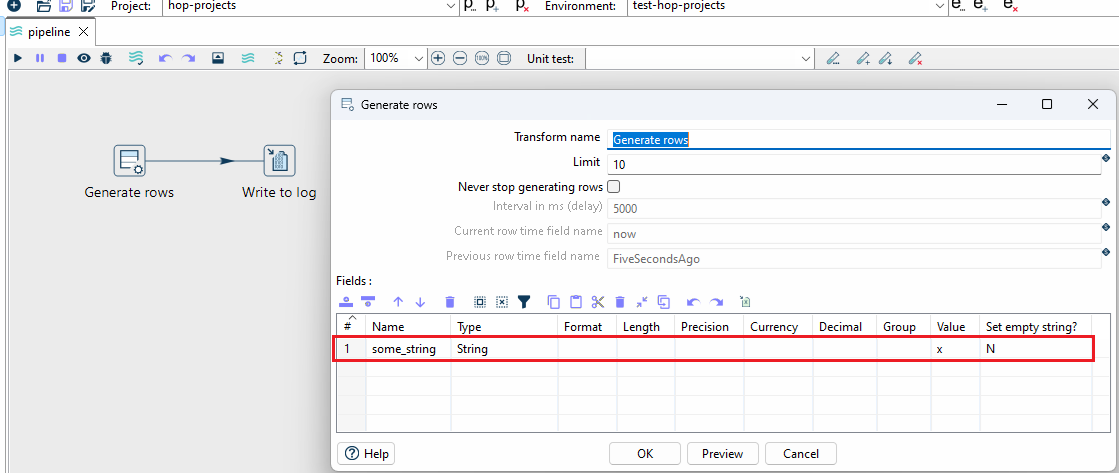
Additionally, we create a workflow that calls the previously created pipeline! 
When editing the pipeline we need to ensure that the “Run Configuration” is set to local. This is because the entire project is zipped and sent to the Hop server. Since the hop-server has been started with it’s default settings we can only use “local” for the run configuration! If you haven’t set up a VM to replicate the example, you can also use the “remote-pipeline” since Hop and the Hop server, along with all configurations, are available on the same system. In this case, not only the workflow but also the pipeline would be displayed in the server’s status log.
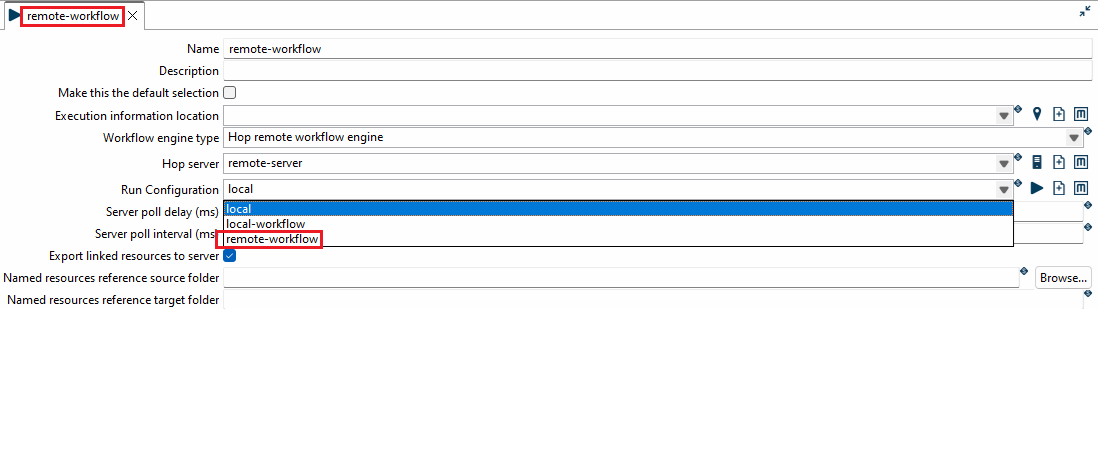
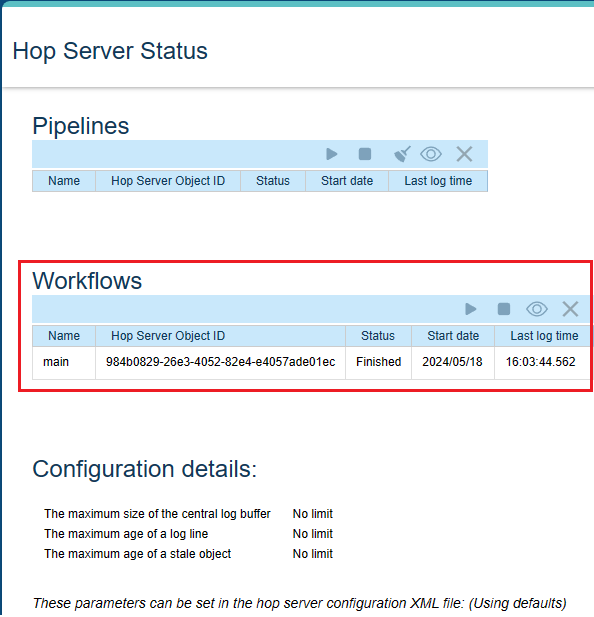
When starting the workflow, we can select our defined run configuration in the tab.

Here’s the result:
If you have any questions, suggestions for improvement, or anything else on your mind, please feel free to contact me via email.